How to screen record on Mac_Top 10
After the introduction of the built-in tool in the Mojave version of the Mac operating system in 2018, recording audio, video, and mouse movements has become much easier for users than before. But how to optimally use the tool provided by Apple to record the screen on Mac? In the rest of the article, we will teach How to screen record on Mac.
Open the Screenshot tool on your Mac
The provided tool for saving screenshots on Mac can also be used for screen recording. To access it, you can choose one of the following methods:
- Using the combination key “Command + Shift + 5“
- Press the key combination “Command + Space” and type “Screenshot” in the search bar
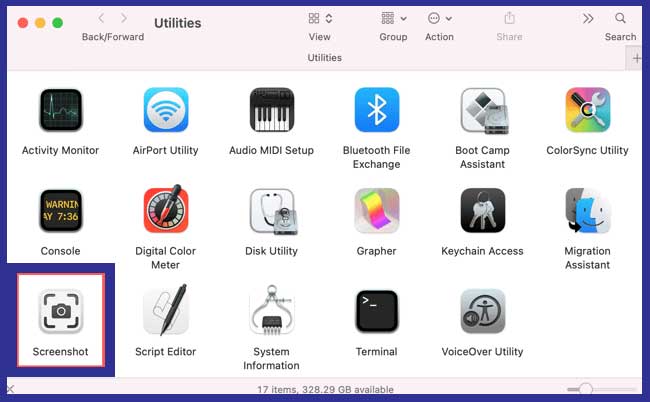
- Using “Finder” and then going to “Go > Utilities” and select “Screenshot“
Set screen recording options
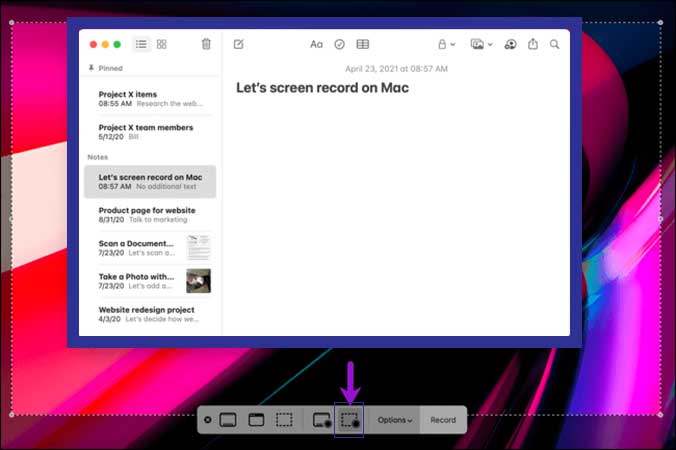
After opening the Screenshot tool, a toolbar will appear at the bottom of the screen. The three options on the left are related to screenshots, and the two options in the middle are for screen recording.

You can record the entire screen by selecting “Record Entire Screen“. But if you want to record only a portion of the screen, select the “Record Selected Portion” option. Then a dotted border will appear to set the recordable part. You can easily capture the desired window or section by moving the pointer or resizing it.
Before starting screen recording on Mac, you can specify the path to save the final file by selecting “Options“. You will also have access to some other useful features.
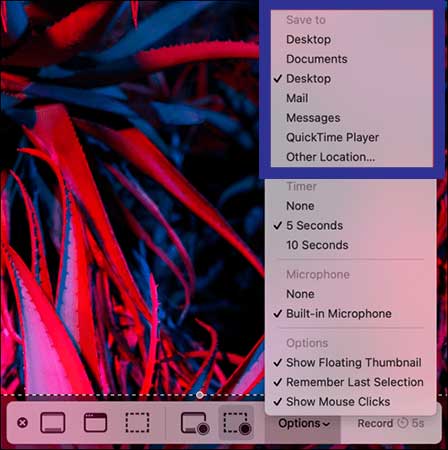
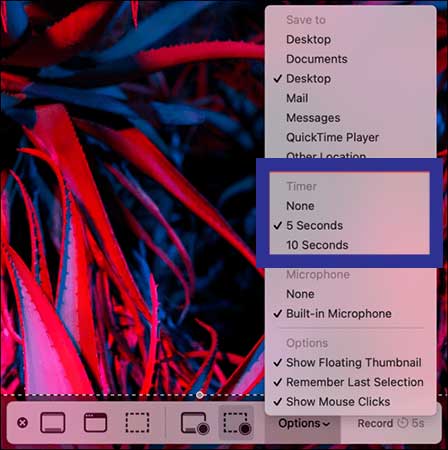
If you need a few seconds of time before the start of recording, you can choose your desired value between 5 and 10 seconds using the “Timer” option.
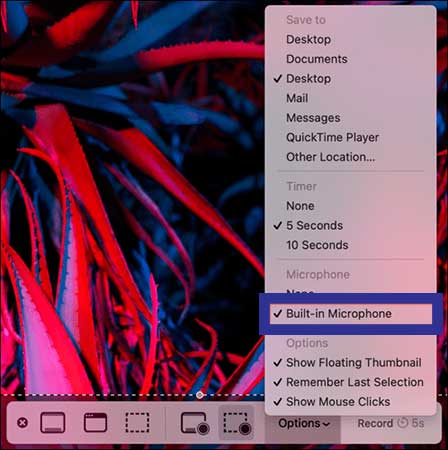
If you want to record sound with a microphone next to the image, you can activate the “Built-in Microphone” option. Such a feature can be useful for making instructional videos and explaining things.
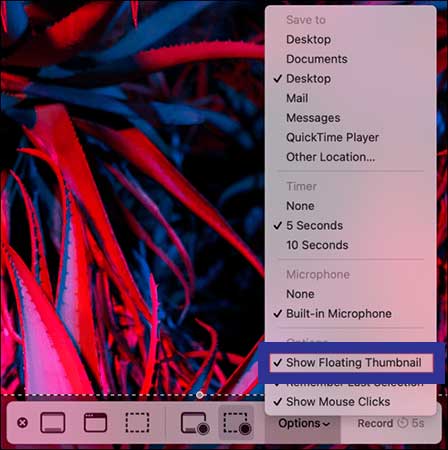
The “Show Floating Thumbnail” option is used to take a screenshot while recording the screen. By selecting it, a small preview of the screenshot will appear in the corner of the screen.
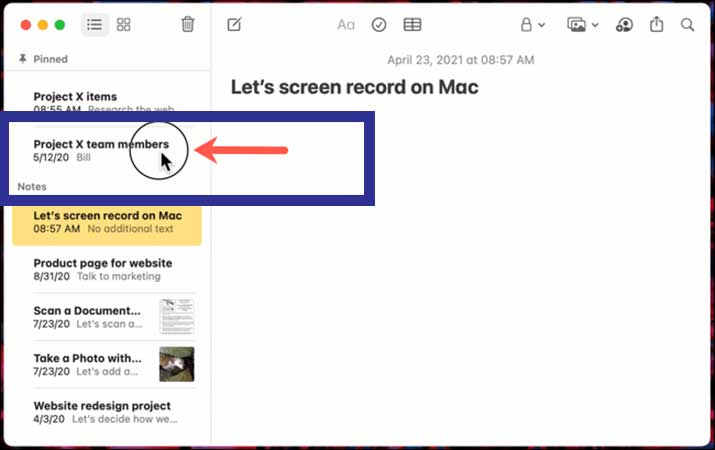
Another useful option in this section is “Show Mouse Clicks“, which can be useful to show all the steps taken in the video. By enabling it, all clicks can be recognized by the appearance of a circle around the mouse pointer.
If you stop recording the screen, you can exit the tool environment by closing the “Screenshot” app or clicking the X symbol on the left side of the toolbar, or pressing the “Escape” key.
Screen recording
After setting everything you need, just click “Record” to start recording. If you have activated the timer in the previous steps, the seconds counter will be activated before the start.

After recording starts, the stop key will appear in the menu bar, and pressing it will stop the screen recording process on Mac. Then you can access the output file by going to the selected path for saving.
Top 10 screen recorder apps for Mac
- QuickTime Player: QuickTime Player comes pre-installed on Macs and offers basic screen recording features.
- ScreenFlow: ScreenFlow is a popular screen recording and video editing software for Macs that offers advanced features such as editing tools, effects, and animations.
- Camtasia: Camtasia is a powerful screen recording and video editing software that allows you to create professional-looking videos.
- OBS Studio: OBS Studio is a free and open-source screen recording software that offers advanced features such as live streaming and video mixing.
- Snagit: Snagit is a screen capture and recording software that also offers basic video editing tools.
- Capto: Capto is a screen capture and recording software that offers advanced features such as video editing and annotation tools.
- Screenium: Screenium is a screen recording software that offers advanced features such as video editing and real-time effects.
- Loom: Loom is a cloud-based screen recording software that allows you to record and share videos quickly and easily.
- Movavi Screen Recorder: Movavi Screen Recorder is a screen recording software that offers basic features such as recording, editing, and sharing.
- Apowersoft Mac Screen Recorder: Apowersoft Mac Screen Recorder is a screen recording software that offers advanced features such as real-time editing and effects.
Frequently asked questions about How to screen record on Mac
- How do I screen record on my Mac?
To screen record on a Mac, open QuickTime Player, select “File” from the menu bar, then click “New Screen Recording.” You can choose whether to record your entire screen or just a portion of it, and you can also record audio from your computer or a microphone.
- What is the keyboard shortcut for screen recording on Mac?
The keyboard shortcut for screen recording on a Mac is “Command + Shift + 5.”
- Where are screen recordings saved on Mac?
By default, screen recordings are saved to the desktop on a Mac. However, you can change the save location by going to “Options” in the screen recording toolbar and selecting a different folder.
- Can I edit my screen recordings on a Mac?
Yes, you can edit your screen recordings on a Mac using various video editing software such as iMovie, Final Cut Pro, Adobe Premiere Pro, etc.
- How do I stop a screen recording on Mac?
To stop a screen recording on a Mac, either click on the “Stop Recording” button in the menu bar or use the keyboard shortcut “Command + Control + Esc.”
- Can I record audio while screen recording on Mac?
Yes, you can record audio while screen recording on a Mac. You can choose to record audio from your computer or from an external microphone.
- How long can I screen record on Mac?
You can screen record on a Mac for as long as you want, depending on the amount of available storage on your computer. However, it is recommended to keep screen recordings short to avoid large file sizes.
- Can I screen record on a Mac with audio from external sources, like an iPad or iPhone?
Yes, you can screen record on a Mac with audio from external sources such as an iPad or iPhone by using third-party software such as Reflector or AirServer.
In this article, we talked about “How to screen record on Mac” and we are waiting for your experiences to use these methods. Please share your thoughts with us.

